Friday, November 18, 2011

Soft body dynamics in the Molecular Workbench

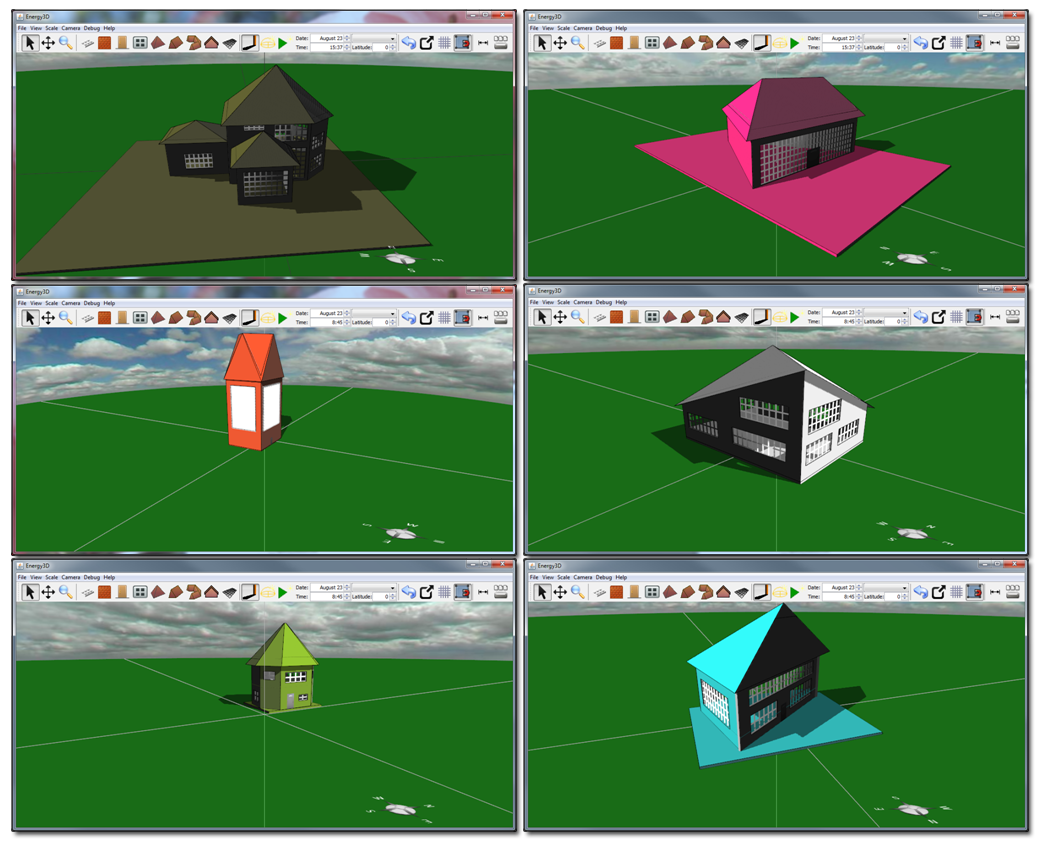
For a long time, some of my colleagues joked about my work on the Molecular Workbench as some trick to randomize "bouncing balls in a box." Part of their impressions came from the overly demonstrated gas simulations that are conveniently linked to some widely taught physical science concepts.

To do justice to the Molecular Workbench, I intend to write a series of blog posts that show the unknown facts about what it is capable of doing. This series is not to defend the work I have done. It is more about digging the potential of computational science and see what favor it can do for science education.

My plain answer to my colleagues' comment is that: "It is something in a box, but not just bouncing balls." One of the things it does more than bouncing balls is its capacity in soft body dynamics.

Soft body dynamics is a subject that focuses on visually realistic physical simulations of the motion of soft bodies (or deformable objects). Why is "soft body" important? The answer is that most biological systems are soft--at the macroscopic level or at the microscopic level. Without the biomechanical flexibility of human body, we would be quite different.Without the biomolecular flexibility of cells, there probably would not be life (e.g., it would not be possible for molecules to move in and out cells).

In many cases when we model microscopic interactions, we don't really need to know how every atom in the system is doing, not only because tracking every single atom in a huge biomolecule is nearly impossible but also it is not necessary to know those details for a basic understanding. Scientists often need to simplify a complex system in order to be able to focus on important aspects. The need is even more so in teaching--the cognitive load for students should be minimized in order to effectively convey the conceptual picture in a short time.

So an interesting question is how flexible biological objects can be simulated in a meaningful way. One approach is to model a soft body as a network of particles connected by elastic constraints (linear, angular, or torsional). This is often known as the mass-spring model in the computer graphics community. In the case of a 2D model, these discrete particles are placed along the edge of a 2D object. In the case of a 3D model, these particles are placed on the surface mesh of a 3D object. Physical interactions among soft bodies are then made possible by giving these particles properties such as a stiff repulsive core, an attractive force, or an electric charge. This allows many interesting phenomena to be modeled, such as self-assembly, docking, and so on.


The above animation shows a box with bouncing balls and swimming "worms," produced by the Molecular Workbench. Does the dynamics of these long soft bodies show some kind of "wormy" behavior that is clearly not that of bouncy balls?

In fact, the mass-spring model implemented in the Molecular Workbench has a number of applications in artificial life ranging from digital fish to digital cells. See this page for a nice summary.

Tuesday, November 15, 2011

Rainbow, iron, and gray


Energy2D is our signature software for simulating invisible energy flow in natural and man-made systems. One of its view shows the temperature distribution calculated by the physics engine. This view renders images similar to what an infrared camera shows. Most IR cameras have a few color palettes for the user to choose. So I think we should provide those options in Energy2D, too.

This blog post shows the three color palettes commonly used in IR imagery that were implemented in Energy2D: rainbow, iron, and gray. I guess the IR folks call the second one "iron" because it looks like the color of an iron bar heated to glow.


A criticism of using colorful heat maps to visualize distributions is the possibility of twisting data and therefore creating illusions--because our perception of color does not go linearly with the linear increase of the RGB values. You can compare these three images and see if that is a problem.

I have blogged a lot about how great an inquiry tool IR imaging represents. The resemblance of Energy2D's temperature patterns to IR images indicates a learning possibility of using simulations to deliver some of the nice features that an IR camera gives--before the prices of IR cameras come down to a couple of hundred dollars.


If you would like to show how they look in real simulations, go to Energy2D's home page and explore from there.


Thursday, November 10, 2011

"Heart"-shape house? "Seastar"-shape house?

In just a few hours, two students were capable of designing ten houses using our Energy3D software, about which they had no prior experience at all. Among them there is one with a floor plan of the shape of a heart and another the shape of a sea star.


We were excited about the ease of use of Energy3D for designing complex houses. However, there are a few concerns. First, these two houses have complicated shapes that take a long time to scale up on cardstock and assemble from the cutout pieces. With a powerful CAD tool like this, students' creativity can be unleashed--they are capable of coming up with sophisticated designs. But computer models are not the final destinations. They are thinking and visualization tools that help students conceptualize their designs. Our goal in engineering projects is to have them make real systems after computer models. If a computer model is too complex, students may not be able to make the real system within a given amount of time in the classroom. On the other hand, if a computer model is inflexible and few variations are feasible, students will quickly be bored. It may be a bad idea to limit the design capacity to simple models with only a handful of features and options. So where is the balance point?

Another thing we should watch out is that students who are too focused on designing the fancy shapes like these may pay less attention to the science and engineering principles we hope to teach in this engineering design challenge--we want them to think about designs that can achieve maximum livability and be energy-efficient. What kind of intelligence can we build into our CAD tool to provide just-in-time instructions that guide their designs?

Friday, September 30, 2011

Swedish newspaper reported IR research with pupils

Swedish newspaper Norrköpings Tidningar reported today our international collaboration with Konrad Schönborn and Jesper Haglund at Linköping University on educational research that is aimed at uncovering the cognitive power of IR imaging for science education. If you don't understand Swedish, the title translates into “The heat camera can become important in school physics.” Jenny Sajjadi, a teacher in math and physics, was quoted as saying: “Physics is seen as an ‘old’ subject and this is a bit of new thinking that can increase the students’ interest. For me as a teacher, it is an entrance to deeper teaching.”

Modern handheld IR cameras deliver tremendous power equivalent to thousands of temperature sensors. This kind of Very Large Scale Integrated Sensing System (VLSISS, my coinage in parallel to VLSI circuits that have revolutionized computing) is about to change the landscape of scientific inquiry in the classroom. It opens up learning opportunities that have never been seen before. This US-Sweden collaboration will advance this agenda. As the first step, the collaborative project will provide some pivotal data for how augmented visualization (to the sense of touch) could be a good intervention to notoriously hardy misconceptions related to heat and temperature. See my earlier blog post about this.

Tuesday, September 27, 2011

An online gas lab simulation

Go to simulation.
You probably know the Ideal Gas Law well. An ideal gas is a hypothetical gas made of randomly moving particles that do not have a volume and do not interact with one another. Have your students ever asked questions such as "What about non-ideal gases? How good is the Ideal Gas Law for real gases?" I don't know about other people's experience, but I myself was intrigued by those questions when I learned the gas laws. Unfortunately, I couldn't go too deeply in trying to answer them because just thinking about the complexity of the motion and interaction quickly intimidated me.

Before computer simulation was widely accessible, you probably would have to pull out the Van der Waals Equation and pray that doing the math would do the trick.

Now, there is a good way to teach this. Using an online molecular dynamics simulation--made using the Molecular Workbench software, investigating non-ideal gases is a piece of cake. This simulation uses a pair of gas containers side by side and allows the user to explore how six variables affect the volume of  a gas: temperature, pressure, number of particles, particle mass, particle size, and particle attraction. It basically covers all the variables in the Van der Waals equation--without saying them explicitly. And there is a variable that is not included in the Van der Waals equation. The simulation reveals exactly why it is not there.

Saturday, September 24, 2011

An online simulation for studying states of matter

Go to the simulation
Have you wondered why some light elements form solids at room temperature whereas some heavy elements form liquids (e.g., mercury) or gases (e.g., radon) at room temperature? Many people tend to associate "heavy" with "solid." But that is not true.

Using an online 3D molecular dynamics simulation--made using the Molecular Workbench software, you can investigate if or how atomic mass, atomic size, interatomic attraction, and temperature affect the formation of a phase. This investigation allows for deeper exploration about what determines a phase.

Java is required to run this simulation in your browser as an applet.

Thursday, September 1, 2011

Designing solar hot air collectors

Engineering design is a lot of fun. The variety of engineering systems students can realistically design and build in classrooms is, however, limited by the constraints of time, resources, and student preparedness.

Currently, construction toys and computer programming are perhaps the most frequently adopted student projects for learning engineering design. These applications cover a number of domains such as robotics and software engineering. 

In our Engineering Energy Efficiency project, we have been working on adding a new option of engineering project that students and teachers can choose to learn and teach engineering.

This Green Building Kit we are developing needs only paper, cardstock, foam board, among other typical office supplies and widely available sensors. Yet, it will allow students to design, build, and test energy-efficient model houses with considerable green features.


An example I am working on is a hot air collector (HAC, also known as the Trombe wall). This is actually very easy to construct (hence a popular DIY project for those who are "green"-minded and handy). It is not difficult for students to add an HAC unit to the sun-facing wall of a model house.

In order for students to have fun with this design challenge, we need to show them that there are a variety of things that they can learn, emulate, test, and invent.

HAC units are usually installed to the part of the sun-facing wall that is not occupied by windows. Windows are necessary to a house because they let light in, but they generally lose more heat than an insulated wall. An insulated wall keeps the heat inside the house, but it does not do anything to collect the heat from the sun and give it to the house. The idea of hot air collector is to use the surface area of the wall that is exposed to the sun to collect some solar energy for warming up the house.

If you think about this engineering design task, it is really a problem about the optimal use of the sun-facing wall surface. So where should we put windows and HAC units and what is the best way of using them? The above images show a variety of designs. Click each image to enlarge it and see the details of each design.

The fourth design combines the benefits of windows and HAC units. It is basically a large HAC unit with the middle part replaced by a window. On the one hand, sunlight still can shine into the house through the two layers of glazing (we automatically have a double-pane window). On the other hand, as the HAC unit is tall, the convective heat exchange between the HAC unit and the room will be more significant. I haven't seen an HAC design like this, so this is my little "invention." Well, I am pretty sure some guy has thought of this before and there is probably a pending patent for this, but never mind about this, I am just demonstrating how an engineering design process in the classroom could be made more inventive.

Our next step is to make it possible for students to add these green architectural elements (HAC is just one of them) in one of our flagship products: Energy3D. Energy3D already has a powerful heliodon for solar design. 

Thursday, August 25, 2011

The Physics Teacher Magazine features IR article

The Physics Teacher Magazine published by the American Association of Physics Teachers (AAPT) selected our article "Infrared Imaging for Inquiry-Based Learning" as a featured article on the September 2011 issue. A featured article is made free to the public. Each issue chooses three featured articles.

In this paper, we described a series of IR experiments that can be readily used to teach the basic concepts of heat transfer and their applications to engineering.

Tuesday, August 23, 2011

Students enjoyed Energy3D in Engineering Energy Efficiency Summer School 2011

Click to enlarge
This week 11 students of different ages (10-17) participated in our three-day summer school for the Engineering Energy Efficiency project. They were charged with using Energy3D to design their own model houses on a computer first and then construct them using inexpensive materials.

Although Energy3D is still in its alpha phase, it seemed to work remarkably well for these students who used the Mac computers we provided (thanks to Dr. Saeid Nourian, the lead developer of the software). Despite of some glitches, the students easily designed their own computer models. Creating the roof, the hardest part using other programs such as SketchUp, has been greatly simplified in Energy3D.

Interestingly, of the five groups, none used the template houses we provided to help them get started, indicating the fact that the students actually preferred designing their very own houses from scratch.

Wednesday, August 3, 2011

Strange thermal conductivity of leaves?

One way to tell if a plant is a plastic fake or not is to touch a leaf. If it feels cool, the plant is a real one. Have you ever wondered why a leaf feels cool? (A leaf of an indoor plant always rests at about the room temperature, plastic or real. It is not really cooler before you touch it. You can confirm this by measuring its temperature using a sensitive temperature sensor.)

We know metals feel cold because they conduct heat fast. Within a given amount of time, our fingers lose more thermal energy to a piece of metal than to a piece of wood.

Do leaves also conduct heat fast? On the contrary.

Let's put a fresh leaf on top of a piece of dry paper. The first set of IR images in this post shows what happened after I used two fingers to touch the leaf (on the left) and the paper to warm them up. The result tells that the leaf actually conducted heat more slowly than the paper, which has much lower thermal conductivity than metals.

Source: Wikipedia.
Now, we have a problem. We know leaves feel cooler than paper. But leaves conduct heat more slowly than paper! Our sense of touch honestly tells us that our fingers lose more thermal energy to leaves than to paper. So where does the thermal energy go on a leaf, if it doesn't diffuse to other parts?

My theory is that the thermal energy goes to heat up the water in the spongy layer of the leaf. The spongy layer lies beneath the palisade layer--the waxy surface layer of the leaf. Its cells are irregular in shape and loosely packed--hence the name "the spongy layer." During transpiration, the spongy layer is full of water in the spaces before they exit stoma. The specific heat of water is considerably high--4.18 J/(g*K) and the spongy layer is filled with water.

My theory is backed by the fact that a dry leaf conducts heat as fast as paper (IR images not shown here). This should not surprise you as paper is made of dehydrated wood fibers. 

Now, the question is why the water in the spongy layer doesn't dissipate thermal energy quickly as water in a cup does (I confirmed the energy dissipation in water by IR imaging, which is not shown here). The thermal conductivity of liquid water is about 0.58 W/(m*K), compared with 0.024 W/(m*K) for air, 0.016 W/(m*K) for water vapor, and 0.05 W/(m*K) for paper. Somehow, the water trapped in the spongy layer cannot conduct heat like free water does.

Let's get get a wet (20% of full water absorption capacity) sponge (left) and a dry one (right) and look at their thermal conductivities under an IR camera. Again, I used my fingers to leave a heat mark on each. The second set of IR images shows a surprising result: the wet sponge appeared to conduct heat more slowly than the dry one!

Does this thermal conductivity protect plants' leaves? Have you wondered why some plants are anti-freezing and some are not? Leaves may have very complicated thermal regulation that we don't quite understand.

Updates on 8/14/2012: 

See these YouTube videos of IR imaging:

Fresh leaf vs. dry leaf: http://www.youtube.com/watch?v=5I2eAU6AZ3Y
Wet sponge vs. dry sponge: http://www.youtube.com/watch?v=2LGfriM3O0Y

Thursday, July 28, 2011

The thermogenesis of a moth under an IR camera

Is a moth warm-blooded or cold-blooded? If you google this, some would tell you it is cold-blooded. They are not completely right. This infrared study shows how a moth warms up before it can fly. So at least a moth is warm-blooded when it moves.

The moth (is this a winter moth -- operophtera brumata?) was kept in a glass jar. The first IR image shows that when it was idle, its body temperature is the same as the ambient temperature. This means that it does not lose energy to the environment -- a clever way for saving energy and probably protecting itself from predators that hunt by detecting thermal radiation.
However, before making a move, it needs to warm up its flying muscles (near its head where the wings are attached, called the thorax) to above 30 degrees Celsius. In this observation, the warming process took 1-2 minutes for the subject, as shown by the sequence of the IR images to the right. (Note: You may only observe this effect when the moth is energetic. A moth on the verge of death does not have enough energy to warm up.)


Click to view a larger image
Note that we used the automatic color remapping, i.e., the heat map is rescaled based on the lowest and highest temperatures detected in the view. As a result, while the moth warmed up and appeared more reddish in the IR view, the background -- in contrast -- became bluer in the IR view. This, however, does not mean that the temperature of the background has decreased. This automatic remapping could create some confusion, but it is necessary in many cases, especially when you don't know what to expect. It maximizes the difference by increasing the contrast and, therefore, allows the observer to pick up subtle changes like this one.

The last image shows that, after the temperature was high enough, the moth started to move. In this particular experiment, the moth responded slowly because it could have been exhausted as it had struggled quite a bit in the jar before it was imaged.

What interests me in this experiment is thermogenesis: the process of heat production in organisms. What biochemical reactions are responsible for the thermogenesis in moths and bees? Can we learn from them to find a green way to heat our homes?

Tuesday, July 26, 2011

Design your own house with Energy3D


Energy3D is a free, open-source tool we are developing from scratch to empower students to design, make, and test energy-efficient model houses.

Today we had some students design and make their own houses. One student succeeded in designing a model house after her own real house. The first two screenshots show her model under the sun in different months.

Like many architecture design tools, students can "walk" into their own design and imagine "living in the house" virtually. The other two screenshots show two close-ups: one from the outside and the other from the inside. The fifth image is a physical house made of foam board and assembled, based on this design.

If they are satisfied with their designs, students can "print" out their houses, cut out all the pieces, and assemble them.

We feel that computer-aided design tools such as Energy3D would be a big help to students when they are undertaking complicated engineering design challenges such as making a house. 3D reasoning is usually difficult for most students. A What-You-See-Is-What-You-Get (WYSIWYG) CAD tool can help them think through.

You may be wondering why we want to develop this tool. Many students complain that their science and engineering projects in schools are not challenging enough to be interesting. Many teachers do strive to make their student projects more attractive. However, they lack appropriate educational tools to do so. Energy3D is an attempt to provide teachers and students with cutting-edge tools that can teach and learn modern full-cycle engineering processes--from design to manufacturing to test-- through an interesting project about energy-efficient houses. We hope this tool would intrigue, inspire, and prepare students for STEM careers.

PS on 7/28: This is another building designed by the same student, which shows an intersecting roof. These examples show that Energy3D could be used to design quite a variety of architecture. It turns out that roof is the most difficult part to design using tools such as Google's SketchUp. We are trying to simplify that part by figuring out algorithms that would enable easy editing of roofs. Our work focuses on two directions. First, an algorithm is needed to automatically generate a roof of a given type based on the boundary walls the user has laid. Second, the topological transformations between different types of roofs need to be identified so that we can build the user interface for adjusting the roof easily.

Monday, July 25, 2011

An infrared view of bees


A bumble bee.
I have been wanting to see what I can do with IR imaging in my backyard. Folks at the Discovery and Animal Planet channels use IR imaging regularly to show thermal patterns of animals and plants. So I guess I could do something with it. I cannot afford a high-definition IR camera. But I think my low-grade IR camera should be able to catch something. Here is an interesting story about bees.

Bees are warm-blooded insects. In order to fly, bees must heat up their flight muscles to above 30oC. So let's check this using an IR camera.

Indeed, a bee looks warm through the IR camera. To be more specific, the thorax of a bee appears to be warmer than the rest of its body (see the IR image to the right). I observed both a honey bee and a bumble bee. Both types have a warmer thorax, where the flight muscles are located. Exactly why the muscles can operate only at a warm temperature is an interesting question.

Bees are known to form societies that depend on successful division of work. Researchers have been using high-definition IR imaging to study bee behavior. With the assistance of IR imaging, German researchers led by Prof. Dr. Jürgen Tautz at Würzburg University found a new type of role known as the heater bees. The heater bees are responsible for maintaining the temperature in the hive where young bees (pupae) grow in sealed wax cells. The bees purposely leave some empty cells among those pupa cells so that the heater bees can crawl into them to warm up the pupae. By varying the temperature of each pupa they can determine what kind of bee it will become. As a result, the heater bees are vital in determining what job a young bee will perform once it matures. In the IR video, heater bees' thoraxes also appeared to be warmer, agreeing with what I observed using my IR camera for a worker bee.

Another article published in Optics Express discussed using IR imaging to evaluate beehive population. The idea is based on the assumption that the more bees in a hive, the warmer it would be. An unhealthy colony that has lost population would appear colder in the IR view, as the number of heater bees might have died down because of the lack of worker bees and hence the food they bring back. And if there are not enough heater bees, the pupae would not grow up normally, worsening the situation.

If you don't want to disturb bees and get stung by them, the non-touch, non-invasive IR imaging is probably the best way to go. :-)

PS on 8/3/2011:

Other flying insects like flies, dragonflies, cicadas, and wasps have a similar thermogram (i.e., warm thorax while active). See these two additional images. Or see this blog post about a moth.

I didn't observe warming in ants. They probably don't produce heat. Or they could be just too small to emit any appreciable IR radiation.

Sunday, July 24, 2011

Use a garden nozzle to create a rainbow


You don't have to wait until it rains to catch a sight of rainbow. You can create one any time as long as there is sunshine. Just use a garden nozzle to create a mist and you will see a rainbow.


Theo Jansen's mechanism

Go to the simulation
Theo Jansen is a Dutch artist and kinetic sculptor who builds large works that resemble skeletons of animals that are able to walk using the wind on the beach. His works are a fusion of art and engineering.

Theo Jansen's famous mechanism can be simulated by using the Molecular Workbench software. Shown in this blog post is a screenshot of the simulation. You can click the link below the screenshot to watch the simulation.

Friday, July 22, 2011

Water permeation across paper and colors under the sun

Yesterday I reported evidence of tiny water permeation across a piece of paper on top of a cup of water. In order to double-check my theory, I placed a piece of transparency film on top of another cup of water and left the two cups overnight. When I came back this morning, I removed the paper and the film from the two cups and viewed the IR image of the two cups of water. To the right is the image I saw.

The cup of water that had paper atop was cooler (the dark circle on the right) than the cup of water that had transparency film atop (the light gray circle on the left). This means evaporation was stopped by the film but not the paper. The only explanation of this effect is that water can permeate through the paper but not the film.

Last October, I blogged about visualizing different colors' ability to absorb light. In that experiment, I used a table lamp as the light source. Later, I realized a flaw in that experiment because a table lamp is, after all, a point source. For the color bars to have equal illumination, we need a light source that is far far way. The sun is such a light source. So I brought the color plate outside and put it under the sun. You can now have a better idea of which color is more capable of absorbing heat. No doubt black won. To my surprise, purple and yellow have approximately the same light absorptivity. So do blue and green. Red, on the other hand, absorbed about the same amount of light as light gray. The background is white. It absorbed the least amount of light energy and appeared to be bluest in the IR image. Amazingly, paper doesn't conduct heat well, otherwise the color bars in the IR image would not have been so well separated.

Thursday, July 21, 2011

Seeing permeation of water molecules

I have blogged about some intriguing IR images when a piece of paper is placed on top of a cup of water. The part of paper above the water warms up (Figure 1) because of the release of latent heat of condensation of water vapor to its underside. If you want to reproduce this effect, note that the shallow the cup, the more pronounced the effect (I used a lid and turned it over to use as a shallow cup). In these IR images, I chose the gray coloring mode. So white represents the hottest and black the coldest.
The warming stops after a minute because the condensate layer reaches the maximal thickness due to the dynamic equilibrium of condensation and evaporation. So we see there is no difference of temperature across the paper any more (see Figure 2). (Well, except for the ring area that touches the edge of the cup, in which it gets the temperature of the cup.)


If we leave the paper for a couple more minutes, the part of paper actually becomes cooler (Figure 3). So what is going on?

My theory is that water molecules have percolated through the paper, which is porous (having a lot of small holes), to the other side and evaporate from there. So we are seeing the evaporative cooling effect from the above side of the paper. Figure 4 presents evidence that supports this theory. If we shift the paper a little bit, we will see three zones with three different temperatures. The coolest zone shows the effect of evaporative cooling from both sides. The overlap zone shows the effect of evaporative cooling from only the above side. And the warmest zone shows the effect of condensation heating from the underside. (Is this pattern beautiful?!)

Figure 5 shows the comparison between direct evaporation (the dark area on the left) and permeation-then-evaporation (the less dark area on the right). The result indicates that the paper did impede evaporation, even though its micro pores allow water to percolate through.

This follow-up study shows that even a humble experiment like placing a piece of paper atop water has many surprises that reveal the richness of science, which all become transparent under an IR camera. I will blog more surprises derived from this experiment later.


Friday, July 1, 2011

A theory of multisensory learning for IR visualization of hands-on experiments

I have been "shopping" for a learning theory that can frame the value added by infrared (IR) visualization to hands-on experiments. Here is a candidate theory.

There are four learning pathways to the brain: visual, auditory, kinesthetic, and tactile. Theory has it that memory and learning could be enhanced if multiple learning pathways are utilized simultaneously.

Let's look at a notorious misconception in heat and temperature. Many people believe that metals are colder than wood or paper. This misconception cannot be easily dispelled because that is how they feel through the sense of touch. As heat transfer is invisible, the tactile experience is all they have.

Now, what if the heat transfer process can be visualized? In other words, what if students have multisensory learning experience: they feel and see it at the same time? IR imaging has enabled us to design such an experiment. The image above shows an IR view that compares heat flow through paper and metal from hands.

Recent studies from Swedish scholars including Konrad J. Schönborn, whom I ran into at a conference and who was enticed by my IR magic, showed that adding haptics to visualization could improve student learning of biomolecular interactions such as docking. Visual and tactile sensorimotor interactions could enhance the cognitive process. Or, in this case, the visualization could "correct" the erroneous idea tangibly gained. The IR visualization shows that the metal is actually warmer than the paper, creating a contradiction with the tactile input that students must reconcile. Such a contradiction can induce cognitive conflict, a mechanism for learning.

Konrad said he would investigate this through a cognitive experiment with students from his University in Sweden. I was psyched. This is complementary to what he has done. In this case, visualization augments touch--exactly opposite to his prior research on molecular binding in which case haptics augments visualization.

Thursday, June 23, 2011

The Molecular Workbench wins a SPORE Award from the Science Magazine

The Science Magazine announced that the Molecular Workbench software has won a SPORE Award. The Science Prize for Online Resources in Education (SPORE) has been established by the American Association for the Advancement of Science to "encourage innovation and excellence in education, as well as to encourage the use of high-quality on-line resources by students, teachers, and the public."

Read our essay published in the Science Magazine.

Here is the AAAS announcement.

Tuesday, June 14, 2011

Journal of Chemical Education features IR work

The Journal of Chemical Education, published by the American Chemical Society, selects my paper "Visualizing Chemistry with Infrared Imaging" as the cover article on the July 2011 issue. The IR experiments presented in the paper were described as "captivating, intriguing, and thought-provoking."

Scientists have long relied on powerful imaging techniques to
see things invisible to the naked eye and thus advance
science. IR imaging is one of the few scientific imaging tools that can be easily used by anyone without complicated setup and calibration. And the price for an affordable IR camera has recently fallen below $900. This is a truly transformative tool that will empower students to learn and discover deep science from everyday life. I have shown many examples in this blog.

Every time I did some experiments with this wonderful tool, there was always something that surprised me. Even a humble leaf from a plant in my office shows a lot of things I don't really have a clue (I will blog more about biological applications later). Being a scientist, I intuitively feel that some of the surprises are not simple at all. Behind them there is very deep science that might have never been discovered before. It is a lot of fun to "crack" the scientific secrets in these surprises.

I hope every student would have the same opportunity to have fun with science as I have. Discovery should be an important part of science in schools.

Friday, June 10, 2011

Infrared illusions


Infrared (IR) thermography is increasingly used to carry out home energy inspection. In theory, it can be used to identify energy leaks by looking at the temperature distribution on the building envelope.

In practice, however, it can be tricky. One of the problems that IR users commonly encounter is optical illusion. After all, what an IR camera detects is IR radiations, which is light. So we are subject to the rules of optics.

To illustrate my point, I took a few IR images of my house at around 9pm at this windless summer night. I looked at a closed window from two different angles and my IR images show that at one angle, the upper pane of the window appeared to be cooler than the lower pane (Figure 1). When I saw this, I knew this was hardly possible, because it was against natural convection--there is no way that the upper pane of the window would be cooler than the lower pane in a house that wasn't being heated or cooled.

Looking at the window from another angle, there was almost no temperature difference (Figure 2). Notice that from both angles, the ridge vent looked pretty hot, of course, after heating by the sun the whole summer day.

So what is it?

This IR illusion is caused by the glass of the window. Glass not only emits IR radiations but also reflects them. Figure 3 shows the reflection of my body radiation superposed to the IR emission of a glass door.

So what did the upper pane of the window appear cooler from the first angle? This is because at that angle, it happened to reflect the night sky. And the night sky is seen by an IR camera to be very cold (below 0°C; explaining this needs another blog article). This reflection was added to the IR emission of the upper pane and caused it to look cooler than it should be.

The lesson learned from this example is that you have to know a lot of science in order not to be deceived by what you see through an IR camera. An IR camera is a powerful tool only in the hand of a person with the knowledge to interpret the image correctly. Having an IR camera sounds snazzy, but it does not necessarily mean you are spared from learning what it can do and cannot do or when and where it can fool you. To some extent, the business of IR thermography is not unlike the business of a detective.